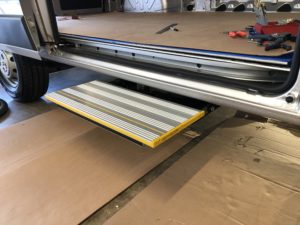
I installed a power extension side step from https://powerdoorandstep.com/
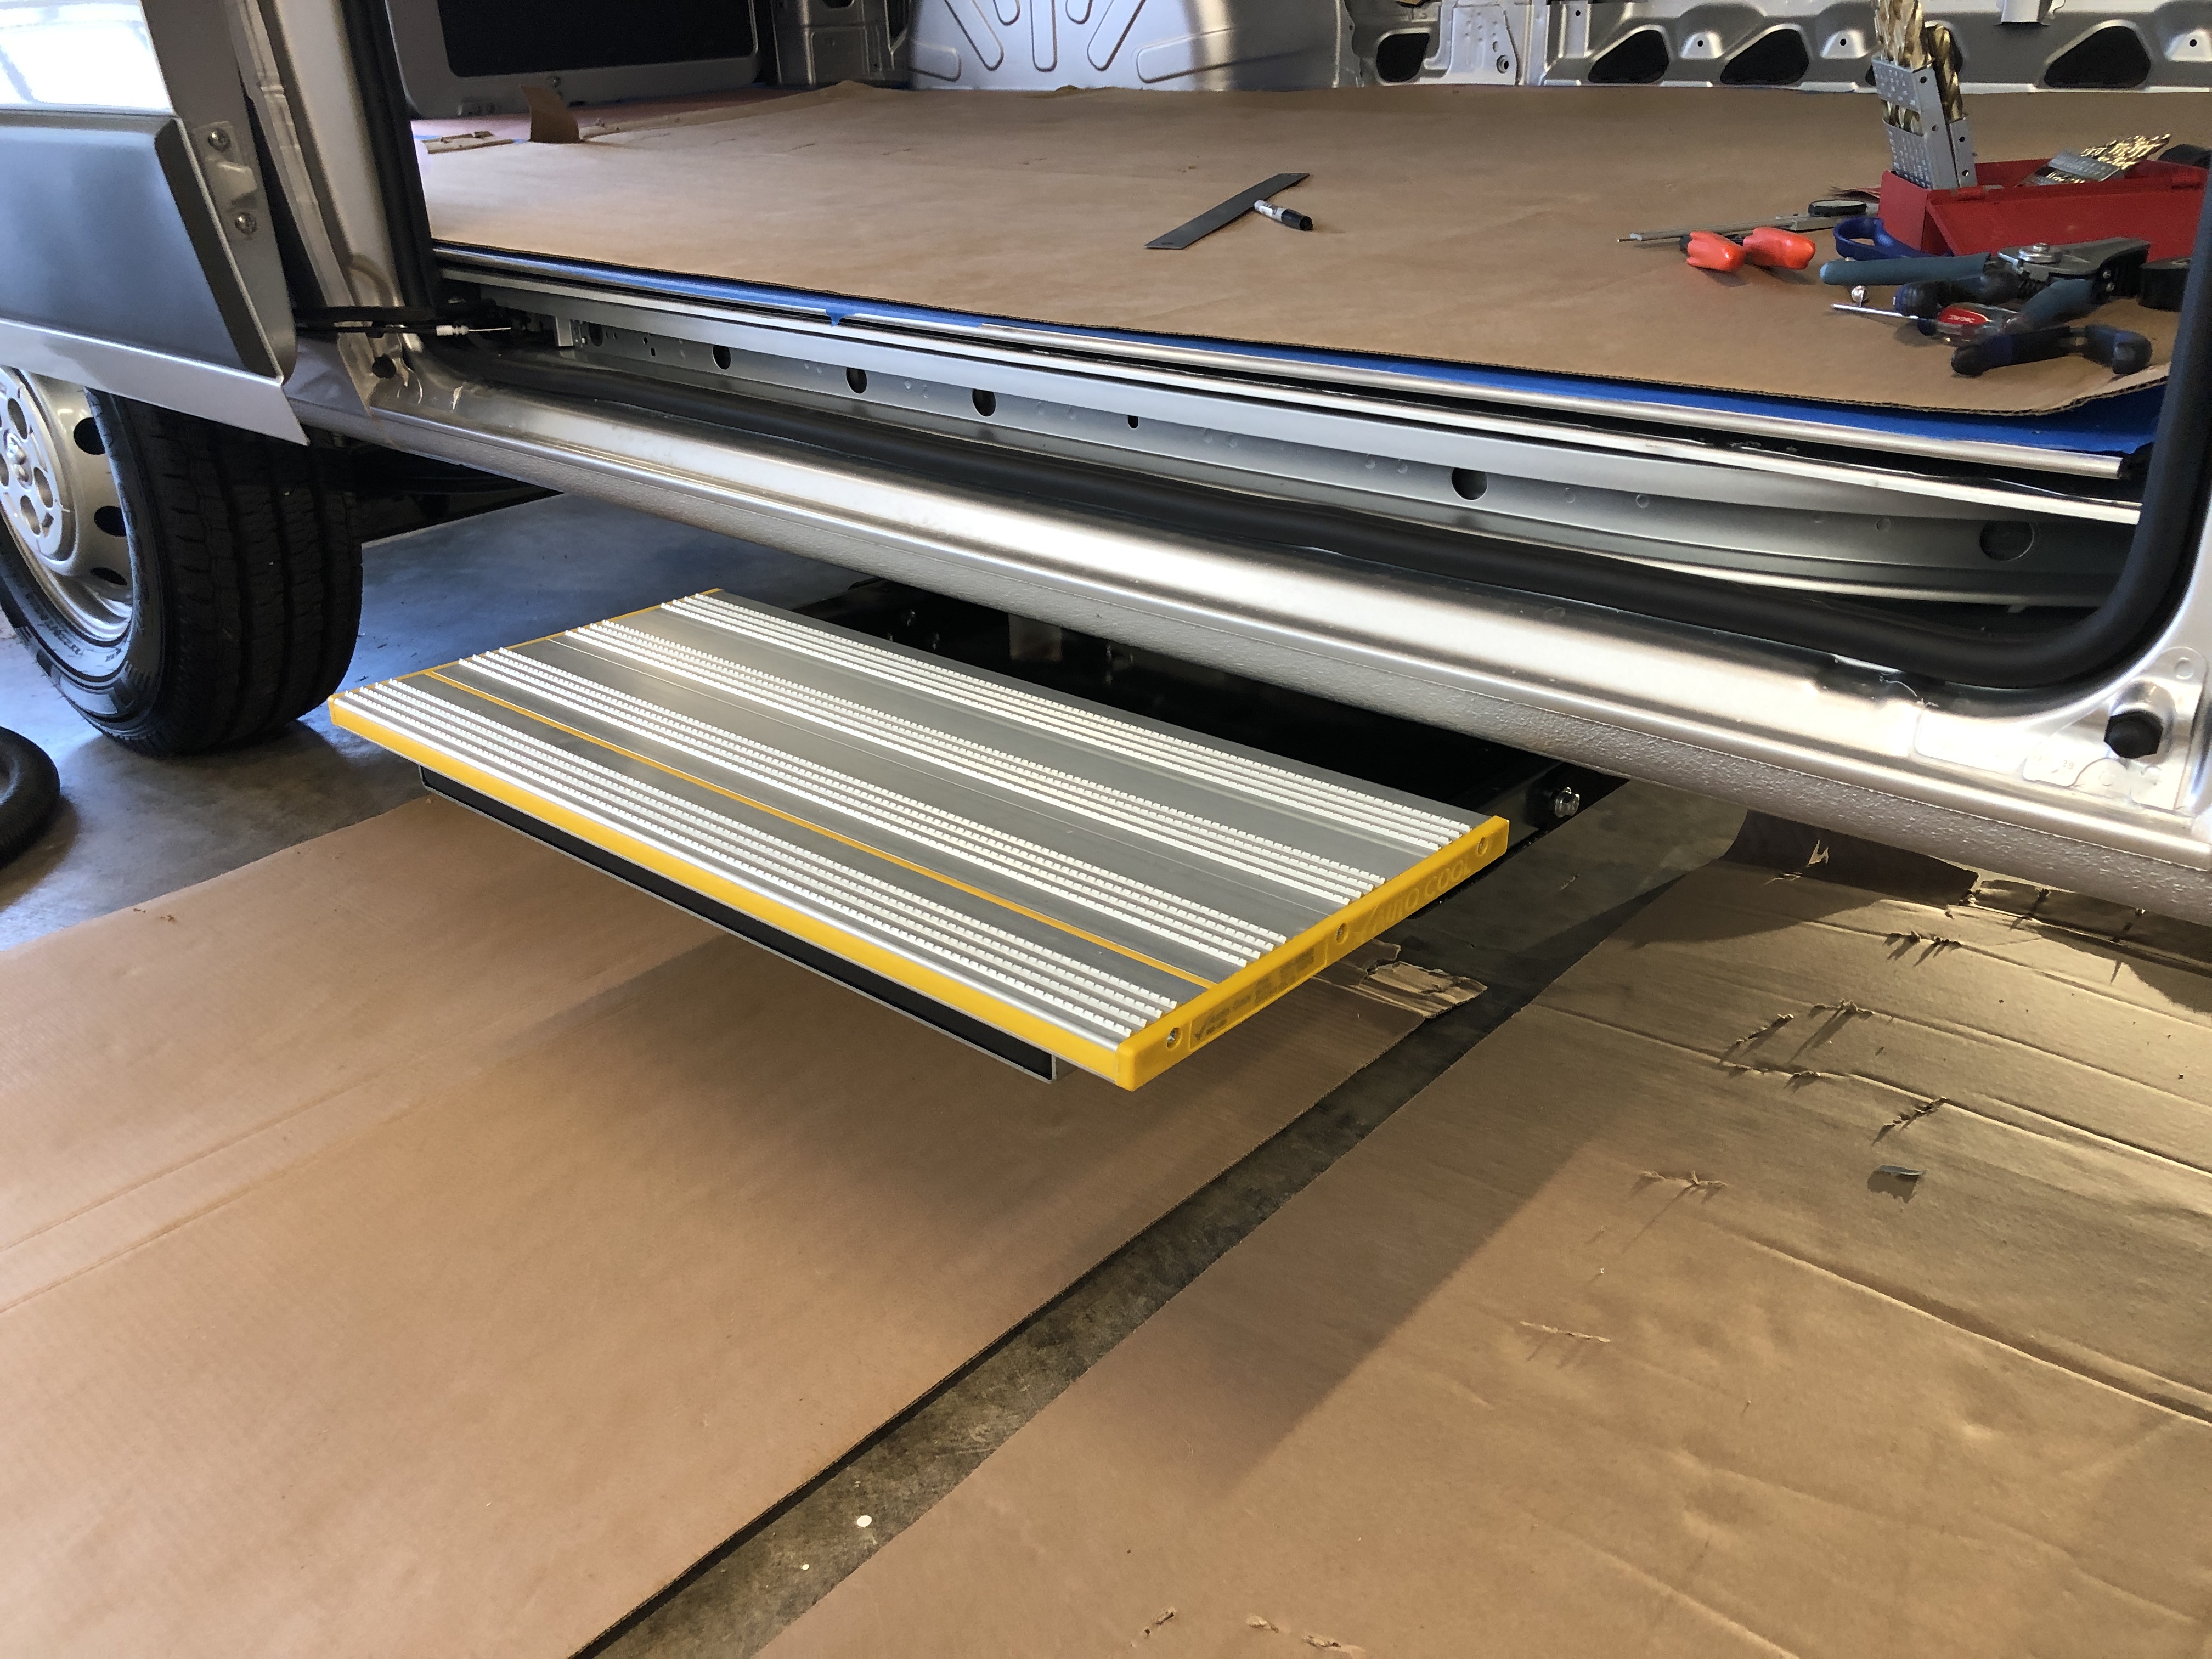
It came quickly and was a reasonable install. The step comes with custom brackets to fit the Promaster so all that you have to do is decide where to locate it and do the install. You need to hold it up into position which I found a car floor jack worked great. Next ensure the holes are lining up to a good location to drill. You will be installing threaded inserts with a crimper. I drilled 1 hole on each bracket first to get the alignment setup. Once you have those holes secured with bolts you know the final location and can drill the rest of the holes. Then you put the inserts into the rest of the holes. Now having some specialty tools makes this entire job much easier. First off I used my festool angle drill attachment for some of the holes. Then others were even too tight for that so I switched out to my air powered aviation angle drill. This worked fantastic for drilling in close quarters.
 I covered the first foot of the wire harness with silicone heat shield as it runs near the exhaust pipe. This should protect it over time. I then ran the wires forward to the B-Pillar just behind the passenger seat. There was an existing hole and grommet which I punched through and fished the wire up into the door pillar. This is the location where I mounted the electronics and accessed power etc. The door switch was easy to install and the wire fished into the same location. For power, since my van has the factory AUX switch panel, there is already a 20A line that’s always on (not ignition) and controlled by a switch on the drivers side dash.
 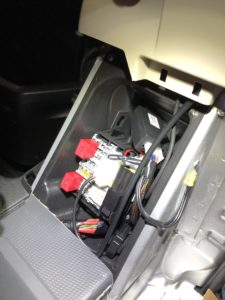 I used this so that once we have arrived at a location and open the door you can turn off the power to the step and leave it out. Then when you are ready to head out you can turn on the power again and close the step. It seems to work just fine with this setup. Here is a picture of that door pillar and the wiring going into that location. This is the “up fitter” connector. You can simply plug into this connector with the right AMP connector shell. I picked it up from Digi-Key.

It makes for an easy install by simply plugging into that connector. Overall the install took about 5 hours to complete. Time will tell how it all works out in day to day use. It’s much easier to step into the van now! I will admit this is kind of a premium feature and at the cost it may be questioned, but it seems pretty cool and will be a neat feature when traveling. Once located at a spot I expect to fix it in the out position most of the time.
So, after some time using the van this summer, I decided that the setup powering off the Van battery system is not ideal. Too many times when I was stopping at the campground for the night and I needed to power down the step, you have to go reach way up front to disable the power using the dash switch. Instead I rewired the system to be powered off the House battery system in the back. Then I installed a simple switch in the door pillar just inside the slider door. This enables you to enable or disable the power step right at the door location. Much nicer! In addition now my power step uses Solar so it’s a green power step 🙂